I got kinda busy after MOTD, and am behind on updates. So…
I built a really crappy looking, but totally functional, bikini top prototype.

The roof is surprisingly quiet and keeps the car surprisingly dry. Art and I drove for hours and hours in the rain around MOTD, and it was surprisingly civilized.
MOTD was fantastic, as always. The car performed spectacularly, no issues.

When Colin drove the car, he thought it was pretty well sorted, but might benefit from even stiffer springs. So we agreed to test that, later.
I decided a couple of things at MOTD: I want a hard cover for the rear (to get rid of the flappy tonneau cover) and I want to create a removable hard top for the cabin.
Thought about doing a fiberglass top for the rear, kinda RedBull-Mini-like… but then thought of maybe doing a hybrid that looks kinda like the canvas/vinyl tonneau, but rigid. I decided to take that route, at least initially.
Made a template for the curved rear section…

Transferred to 1/2″ plywood…

Cut and fit…

Wrapped it in marine-grade vinyl…

Mounted brackets…

Installed. Seals with the factory weather strip.

Cut and fitted the other two pieces around the cage.

Wrapped and installed…

Makes an excellent bar top, while retaining the general look of the tonneau.

Still opens to allow access. Used it on the street and at the track, and it works very well. I’m gonna add some aluminum angle underneath to stiffen them and prevent sagging. I’m happy with this.
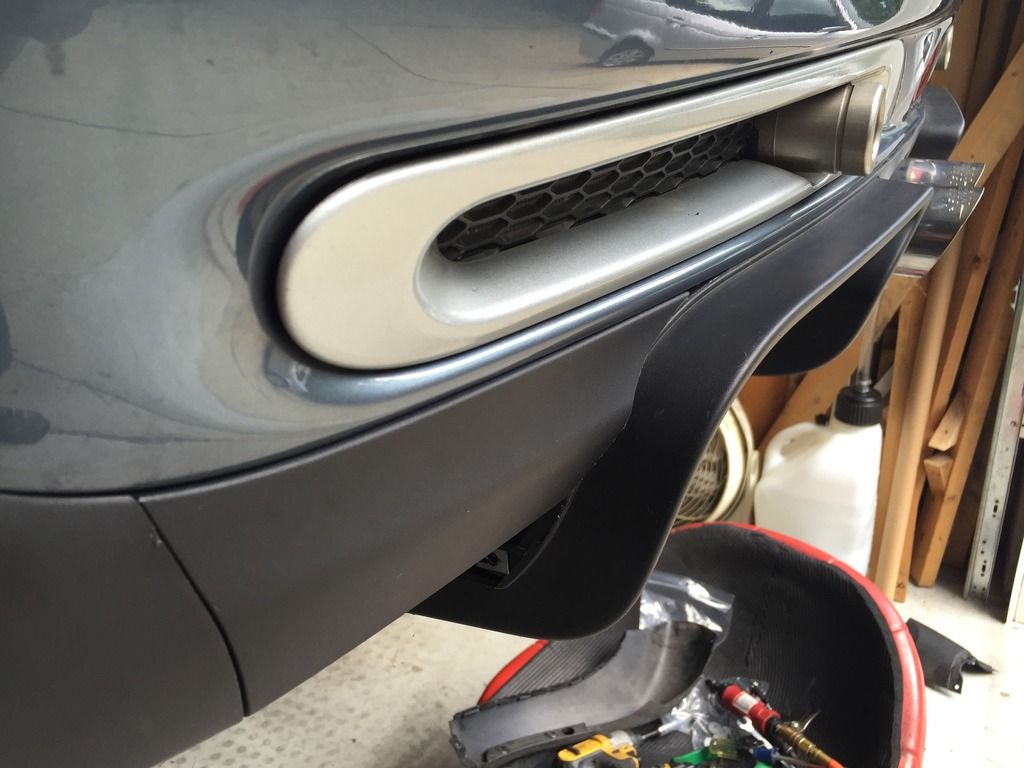
Took a first shot at brake ducts. Cut the GP black grille piece behind the faux ducts, to accept 2.5″ hose. Liberal use of racer tape.


Got some brackets from Coleman Racing and initially mounted on the front of the A-arms. I wanted to try this routing, because there’s so much stuff to work around on the back side of the A-arm (brake lines, sway bar end links, axle…)


Flattened the hose just a bit to provide clearance at full steering lock with fat tires. This held up well at the track, but it’s not providing as much air to the inner rotor as it could from the other side of the hub where it’s more open. So I’m gonna make some different brackets and re-route them. I also got titanium brake pad shims to help with heat transfer to the brake pistons and fluid.
Stiffer springs arrived (10kg/mm front and rear). I installed and re-corner-balanced…


They were fantastic at the track. Suspension feels “right”.
Installed a bigger top-mount intercooler.

And installed a GreenePerformance coolant tank.

I mentioned a few times that I went to the track, yes?

Dirty little track beast, with the track wheels.

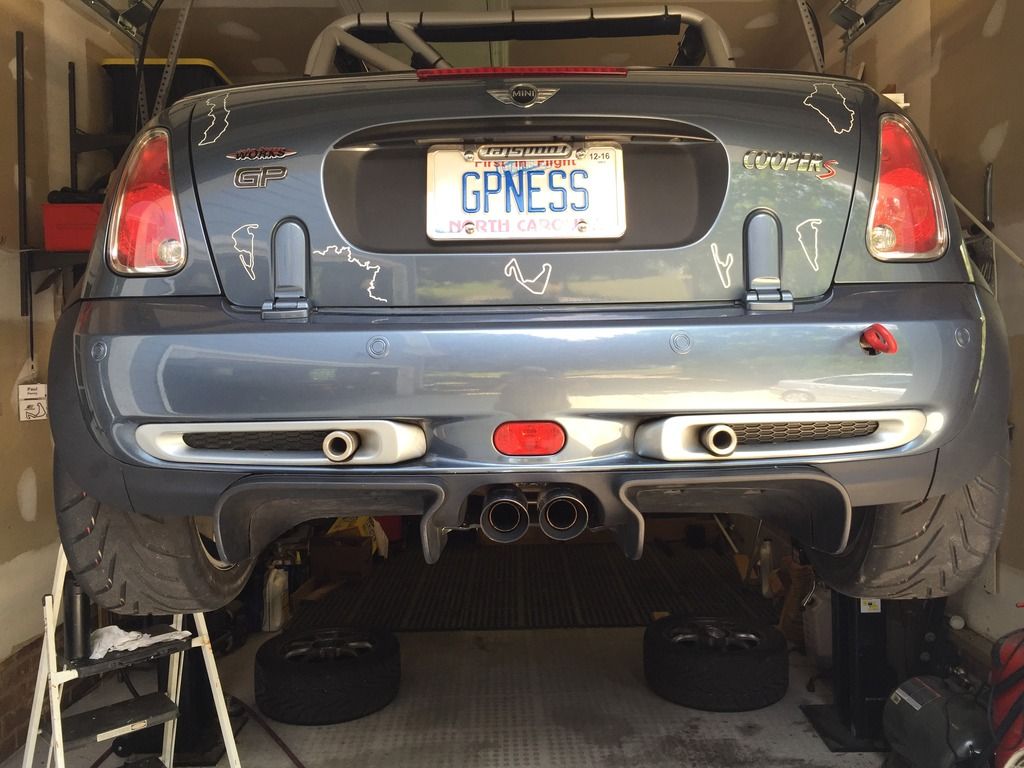
While at MOTD, Colin mentioned that he knew someone selling a GP2 rear diffuser setup for a decent price. I crawled around under Mark Dissen’s GP2 looking at it, and thought I could probably make it work on my car with the Milltek rear section and the battery box in place. So I bought it.
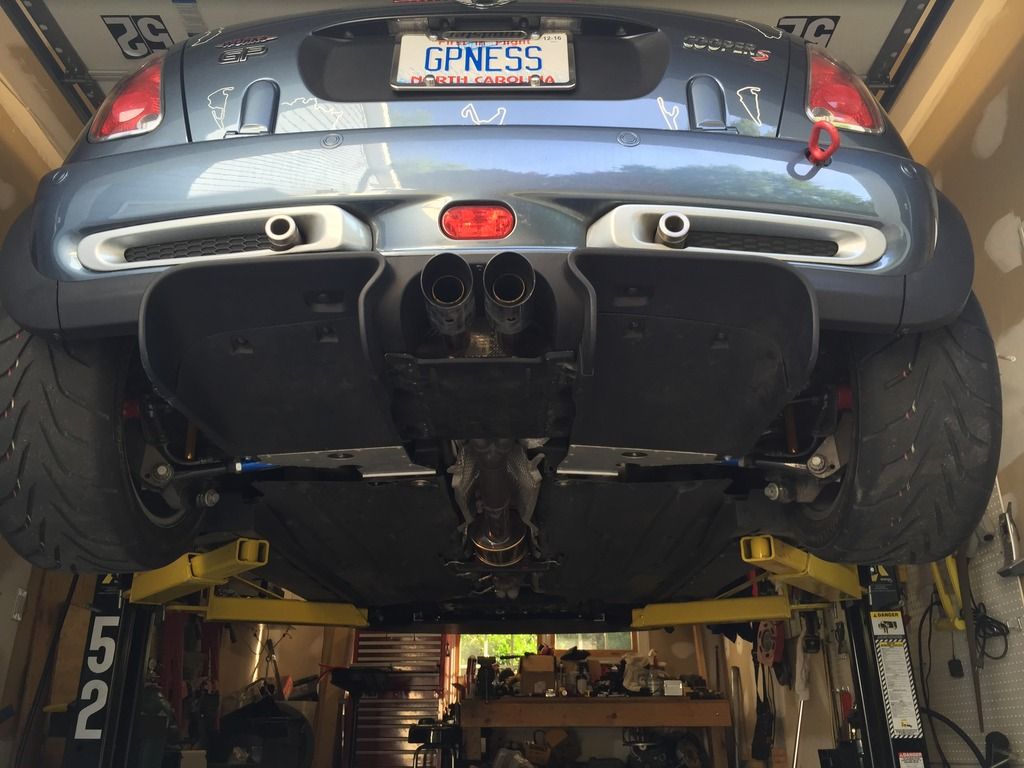
While the diffuser clears the milltek and the battery box with no problem, extensive fitment is required: Must cut slots for the tabs in the bumper. Must trim the edge on the diffuser that fits into bumper (it’s too long to fit in the groove). Must notch that diffuser edge to go around protrusions in the groove. Must do major trimming to the tunnels to clear the control arms. Must do major modifications to the brackets to clear the exhaust. Must fab some other brackets to secure front of tunnels. Must do heat shield origami. Must cut rear trim to fit around diffuser.
So it’s not a trivial mod. But…


It looks GOOD. And works well. I decided it will fit better with standard rear bumper trim, instead of the GP trim. So I bought a new set of that, and need to re-fit it. Also, the curvature of the R56 bumper is slightly different than the R52/R53 bumper, so the way the ends of the diffuser fascia fit is a little funky. I need to work on that a bit more to get it to stay put the way I want. Still, I love it. The car feels more stable at speed, and seems to have noticeably less wind noise, so I think this helped with some of the rear turbulence. We’ll see how it does at the track.
OK, we’re caught up. Today, I’m re-fitting the rear trim and diffuser fascia, and re-working the brake ducts.